
Introduction
A custom stained glass dome does more than adorn a ceiling—it creates a living work of art that exudes luxury and timeless beauty. Crafted to harmonize with your architecture, lighting, and design sensibility, each dome becomes a stunning focal point. Whether gracing a private villa, luxury hotel, or cultural landmark, a bespoke dome elevates the entire space in ways standard designs simply cannot.
Understanding Custom Stained Glass Domes
A stained glass dome serves two important roles:
- Functional – bringing natural light into interiors and creating energy efficiency.
- Aesthetic – transforming a ceiling into an artistic centerpiece.
The difference between custom domes and standard skylights lies in personalization. With a custom project, every detail—from the shape and size to the choice of glass and patterns—is designed to reflect the owner’s vision.
For instance, a hotel lobby may require a dramatic centerpiece with vibrant colors, while a private villa might benefit from a softer, more elegant dome that harmonizes with classical interiors.
Step 1: Initial Consultation & Inspiration
Every custom dome project starts with a vision. During the initial consultation, the design team listens to the client’s goals, aesthetic preferences, and functional needs. Inspiration can come from classical architecture, traditional Iranian motifs, Art Deco elements, or even abstract patterns.
This stage ensures the design is not just beautiful but also fits seamlessly into the surrounding architecture.
Step 2: Design & 3D Visualization
After gathering ideas, the next step is conceptual design. Traditionally, stained glass was drawn by hand, but modern studios now use 3D visualization tools to present accurate previews.
This allows clients to see how the dome will look under natural and artificial lighting. Adjustments in color, geometry, or symmetry can be made before production starts. A well-designed visualization minimizes errors and guarantees that the final product matches the client’s expectations.
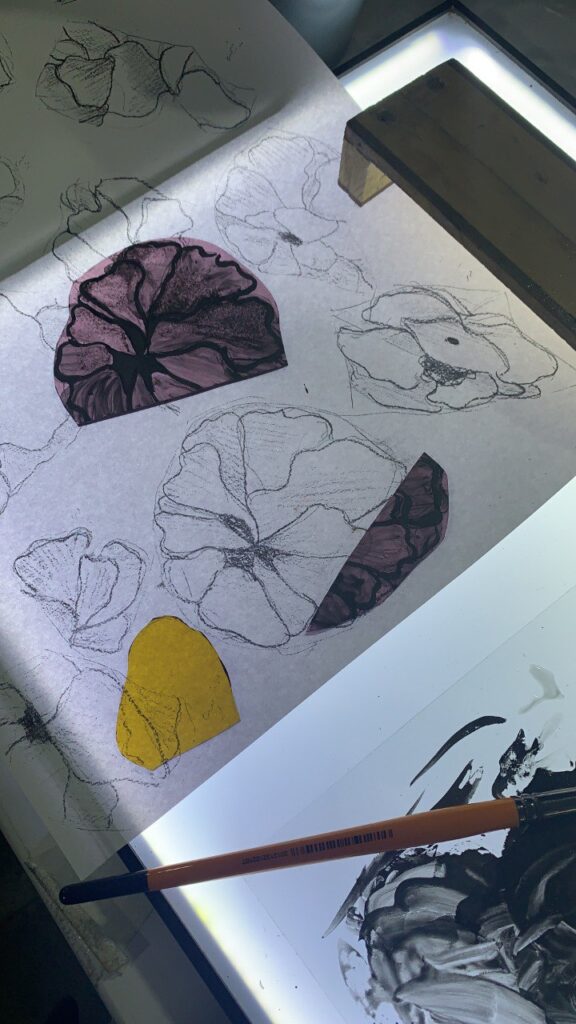
Step 3: Material Selection
The soul of a stained glass dome lies in its materials. Choices include:
- Beveled glass: creates sparkling light reflections.
- Textured glass: adds depth and dimension.
- Colored glass: delivers vibrant, emotional atmospheres.
- Metal framing (steel, brass, or copper): ensures both strength and elegance.


The material selection process is essential, as it directly impacts durability, light diffusion, and visual effect.
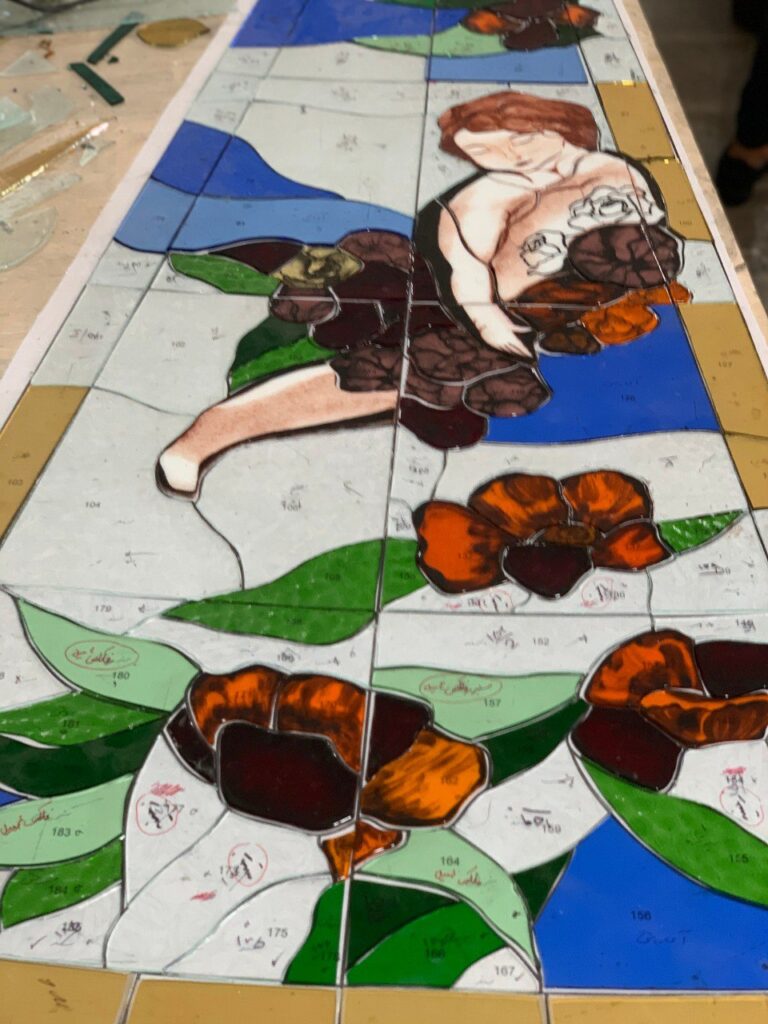
Step 4: Handcrafting the Dome
This stage is where craftsmanship comes alive. Master artisans carefully cut, polish, and assemble each piece of glass using techniques passed down for centuries.
Unlike machine-made glass, handcrafted stained glass carries unique imperfections that enhance its authenticity and charm. The dome’s structure is reinforced with custom framing to withstand pressure, temperature changes, and long-term use.
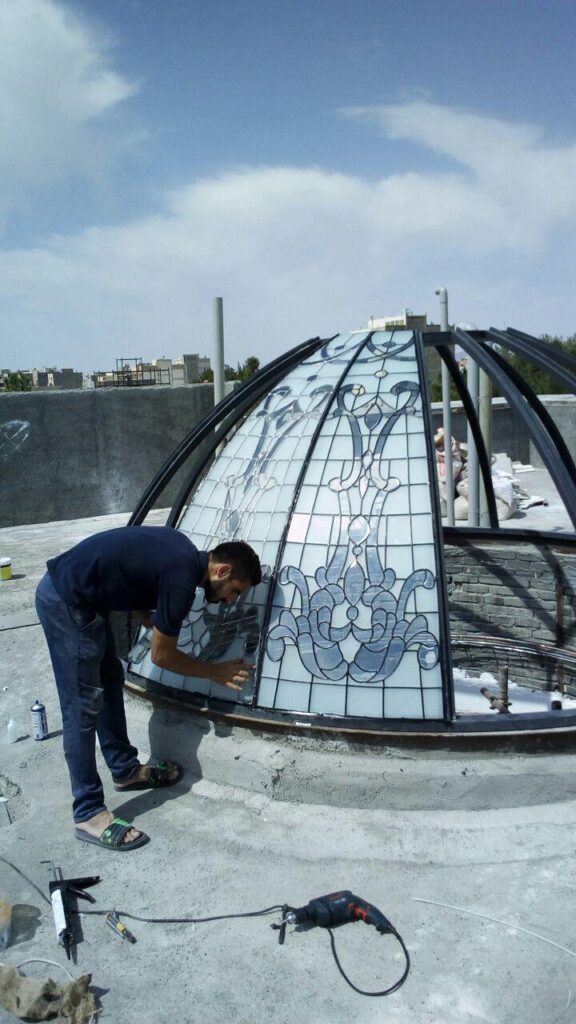
Step 5: Installation & Final Touches
Once completed, the dome is transported to the site for installation. Safety and precision are critical during this phase, especially when dealing with large architectural projects.
After installation, final touches—such as lighting adjustments—are made to highlight the glass patterns. The result is a breathtaking fusion of art and architecture that elevates the entire space.
Conclusion
A custom stained glass dome is more than a decorative skylight; it’s a legacy of craftsmanship, culture, and individuality. From concept to completion, each stage ensures that the final piece not only enhances the building but also becomes its defining feature.
If you’re considering adding a bespoke stained glass dome to your project, now is the perfect time to bring your vision to life. Contact our team to discuss design possibilities and transform your space into a timeless masterpiece.